Solar bollard light installation is very easy, there is no need for wiring, installing outlets, or hiring a professional installer, all you need is a few simple tools from your tool shed: an electric drill, hammer, and teardrop ratchet to install these lights yourself. This is a step-by-step guide to how our solar bollard light is installed.
Take the 360°Sun-Chasing solar bollard lights —— Tracker Bollard Post Light(ABL-02)as an example.
View the video
Step-1: Construct the base
You should build a solid base to ensure the solar bollard light fits firmly to the ground. To do so, first, drill 3 holes into the ground from the base mounting holes; the depth of the hole should be at least 0.2 feet with a diameter of 0.1 foot on the concrete. However, these measurements will vary by mounting land and surface.
Once the hole is ready, insert expansion screws into the hole, then put on the base; ensure not to lose nuts and spacers. Tighten the anti-theft screws below to keep the light post stable and erect.
Step-2: Install the light head
Once the base and post are fixed, turn on the switch, and you can see the red button under the light head.
Keep the light head, on which the fixing screws have been tightened, above the light post. The strong bollard fixture, with the light post and light head, is now ready. Try shaking the bollard body, you can confirm that everything is strong and stable. Your solar bollard lights are ready to use.
Step-3: Control the lights
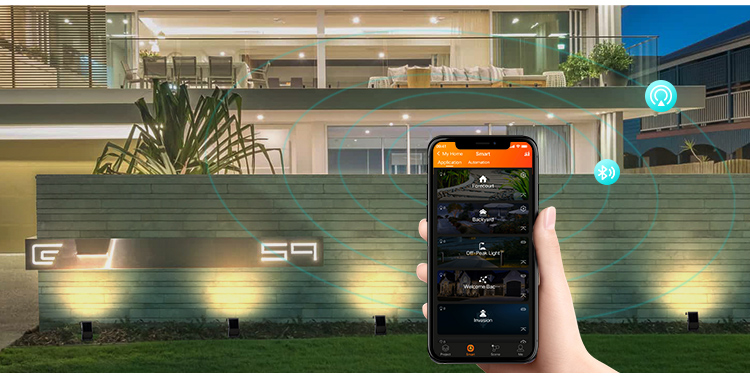
Now, you can use the Adelot app to control the lights. It supports dimming, timing, setting scene, creating groups, etc. which is more convenient for you to smartly remote control and manage the light fixtures.
In choosing the ideal solar bollard light for your project, you must ensure a proper installation.
Our 360°Sun-Chasing solar bollard lights —— Tracker Bollard Post Light are strong and stable and can be installed on a wide range of lands, and surfaces with special anti-theft screws, they are perfect for public lighting in parks, marinas, plazas and more.